
This document is relevant for: Trn2, Trn3
How to set up your environment for NKI development#
The Neuron Kernel Interface (NKI) lets you write kernels that directly use hardware resources in the Trn2 / Trn3 family of Neuron ML accelerators. NKI kernels use low-level operators that match instructions on Neuron devices. You can use kernels with PyTorch or JAX to speed up critical sections of your model. This topic shows you how to set up your environment for NKI development using the AWS Neuron SDK. After you set up your environment, you can access the NKI and Neuron Graph compilers.
Task overview#
This tutorial walks you through launching a Trn2 / Trn3 instance with an Amazon Machine Image (AMI).
Prerequisites#
You need an AWS login to launch a Trn2 / Trn3 EC2 instance.
Instructions#
You can set up an environment to use NKI in several ways. The easiest method uses the Neuron Multi-framework Deep Learning AMI (DLAMI). The DLAMI provides Python virtual environments (using venv) for frameworks like PyTorch and JAX. AWS updates the DLAMI with each new Neuron SDK release. If you prefer to manage the environment directly, you can start with a standard Amazon Linux 2023 (AL2023) AMI and install the Neuron SDK and NKI library directly. If you already have a configured environment, follow the upgrade tab instructions to upgrade to the latest SDK.
Launch the instance using the Neuron Deep Learning AMI.
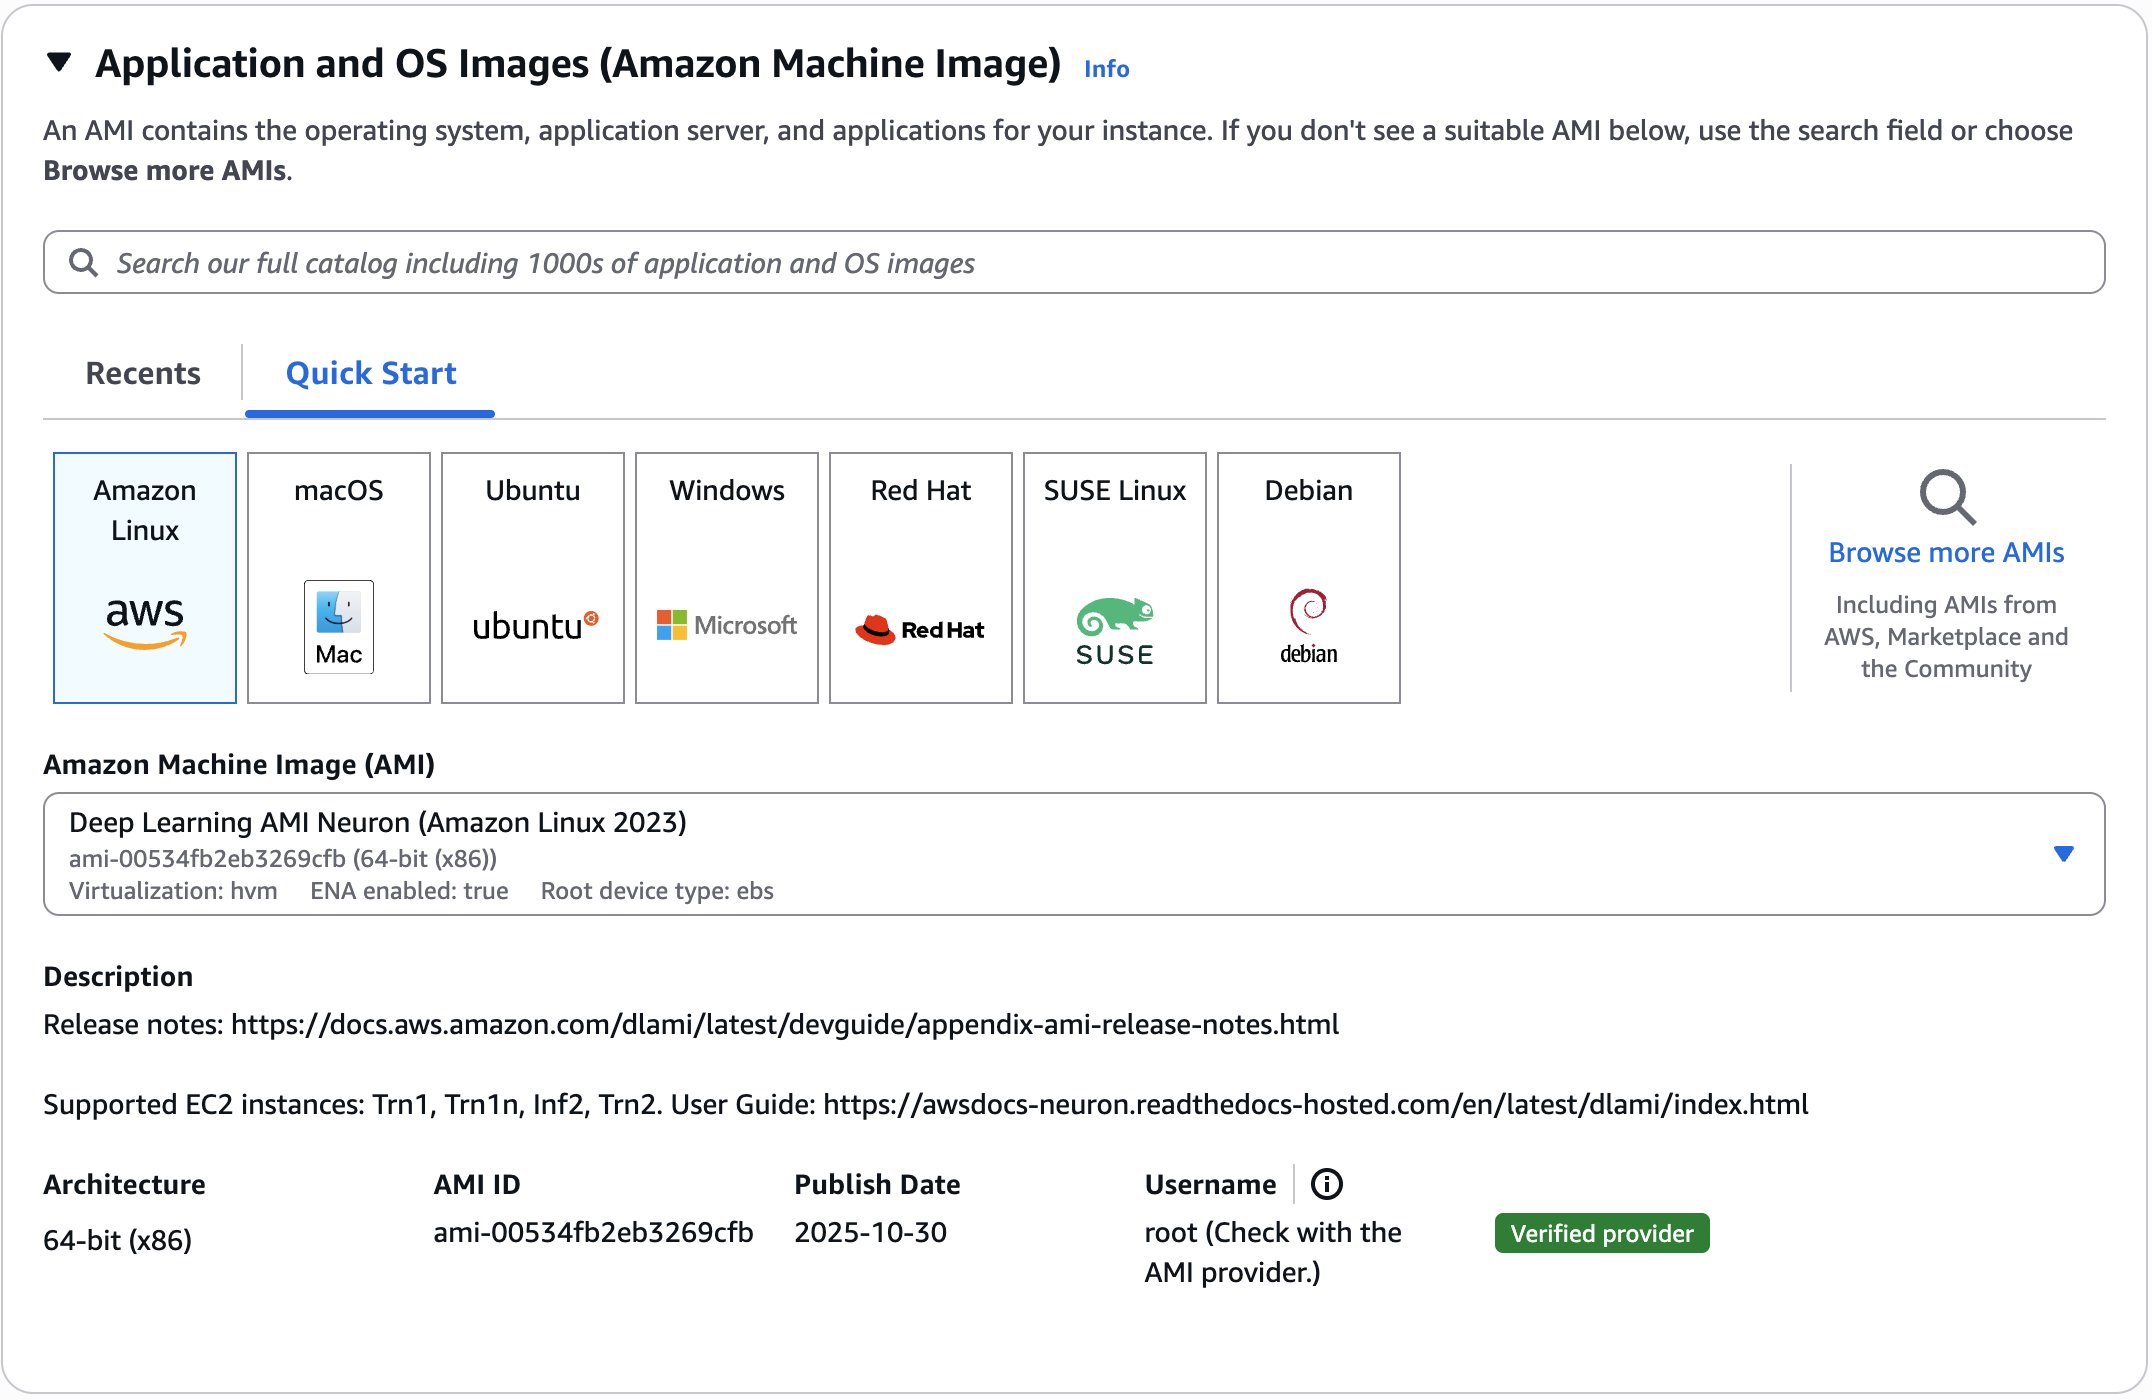
Select the desired region from the EC2 Console and choose “Launch Instance”. In the “Quick Start” tab, select “Amazon Linux”, then in the AMI dropdown search for “neuron”. The “Deep Learning AMI Neuron (Amazon Linux 2023)” should be the only option. Select an Trn2 / Trn3 instance type. For more details see the Trn2 or Trn3 EC2 pages.
Once the instance is launched, an environment can be activated with the NKI library and Neuron SDK already installed.
Note: If you are looking to use the Neuron DLAMI in your cloud automation flows, Neuron also supports SSM parameters to easily retrieve the latest DLAMI id.
Launch the instance using the Amazon Linux 2023
Select the desired region from the EC2 Console and choose “Launch Instance”. In the “Quick Start” tab, select “Amazon Linux”, then in the AL2023 AMI. Select an Trn2 / Trn3 instance type. For more details see the Trn2 or Trn3 EC2 pages. Note: You will need to allocate at least 85 GB of storage.
Install Drivers and Tools
# Configure Linux for Neuron repository updates
sudo tee /etc/yum.repos.d/neuron.repo > /dev/null <<EOF
[neuron]
name=Neuron YUM Repository
baseurl=https://yum.repos.neuron.amazonaws.com
enabled=1
metadata_expire=0
EOF
sudo rpm --import https://yum.repos.neuron.amazonaws.com/GPG-PUB-KEY-AMAZON-AWS-NEURON.PUB

# Update OS packages
sudo dnf update -y

# Install OS headers
sudo dnf install -y "kernel-devel-uname-r = $(uname -r)"

# Install git
sudo dnf install git -y

# Install Neuron Driver
sudo dnf install aws-neuronx-dkms-2.* -y

# Install Neuron Runtime
sudo dnf install aws-neuronx-collectives-2.* -y
sudo dnf install aws-neuronx-runtime-lib-2.* -y

# Install Neuron Tools
sudo dnf install aws-neuronx-tools-2.* -y

# Add PATH
export PATH=/opt/aws/neuron/bin:$PATH
Set up either a PyTorch or JAX environment to use with NKI
# Install External Dependency
sudo dnf install -y libxcrypt-compat

# Install Python
sudo dnf install -y python3.11

# Install GCC
sudo dnf install -y gcc-c++

# Create Python venv
python3.11 -m venv aws_neuron_venv_pytorch

# Activate Python venv
source aws_neuron_venv_pytorch/bin/activate
pip install -U pip

# Install Jupyter notebook kernel
pip install ipykernel
python3.11 -m ipykernel install --user --name aws_neuron_venv_pytorch --display-name "Python (torch-neuronx)"
pip install jupyter notebook
pip install environment_kernels

# Set pip repository pointing to the Neuron repository
pip config set global.extra-index-url https://pip.repos.neuron.amazonaws.com

# Install wget, awscli
pip install wget
pip install awscli

# Install Neuron Compiler and Framework
pip install neuronx-cc==2.* torch-neuronx==2.9.* torchvision nki
# Install External Dependency
sudo dnf install -y libxcrypt-compat

# Install Python
sudo dnf install -y python3.11

# Install GCC
sudo dnf install -y gcc-c++

# Create Python venv
python3.11 -m venv aws_neuron_venv_jax

# Activate Python venv
source aws_neuron_venv_jax/bin/activate
pip install -U pip
Neuron provides two different ways to install the JAX package. The first is a common package with jax-neuronx packaged together and tested with all the necessary dependencies including jax, jaxlib, libneuronxla, neuronx-cc, and nki. This package can be installed as follows.
pip install jax-neuronx[stable] --extra-index-url=https://pip.repos.neuron.amazonaws.com
Alternatively, jax, jaxlib, libneuronxla, neuronx-cc, and nki can be installed separately, with jax-neuronx being an optional addition. This version can be installed as follows.
pip install jax==0.7.0 jaxlib==0.7.0
pip install jax-neuronx libneuronxla neuronx-cc==2.* nki --extra-index-url=https://pip.repos.neuron.amazonaws.com
Upgrading an existing AL2023 install of the Neuron SDK with NKI can be done for PyTorch or JAX.
# Install External Dependency
sudo dnf install -y libxcrypt-compat

# Activate Python venv
source aws_neuron_venv_pytorch/bin/activate

# Install Jupyter notebook kernel
pip install ipykernel
python3.11 -m ipykernel install --user --name aws_neuron_venv_pytorch --display-name "Python (torch-neuronx)"
pip install jupyter notebook
pip install environment_kernels

# Set pip repository pointing to the Neuron repository
pip config set global.extra-index-url https://pip.repos.neuron.amazonaws.com

# Install wget, awscli
pip install wget
pip install awscli

# Update Neuron Compiler and Framework
pip install --upgrade neuronx-cc==2.* torch-neuronx==2.9.* torchvision nki
# Install External Dependency
sudo dnf install -y libxcrypt-compat

# Activate Python venv
source aws_neuron_venv_pytorch/bin/activate

# Install wget, awscli
pip install wget
pip install awscli
JAX upgrade can be done with either the combined jax-neuronx package which is tested to work together as follows.
pip install --upgrade jax-neuronx[stable] --extra-index-url=https://pip.repos.neuron.amazonaws.com
Alternatively, jax, jaxlib, libneuronxla, neuronx-cc, and nki can be upgraded separately, with jax-neuronx being an optional addition. This version can be installed as follows.
pip install jax==0.7.0 jaxlib==0.7.0
pip install --upgrade jax-neuronx libneuronxla neuronx-cc==2.* nki --extra-index-url=https://pip.repos.neuron.amazonaws.com
The easiest way to set up an environment to use NKI is by using the Neuron Multi-framework Deep Learning AMI (DLAMI). The DLAMI provides Python virtual environments (using venv) for a variety of frameworks including PyTorch and JAX and is updated with each new release of the Neuron SDK. For customers that prefer to manage the environment directly, it is also possible to start with an standard Ubuntu 24 AMI and install the Neuron SDK and NKI library directly. Customers who already have an environment configured can follow the instructions in the upgrade tab to upgrade to the latest SDK.
Launch the instance using the Neuron Deep Learning AMI
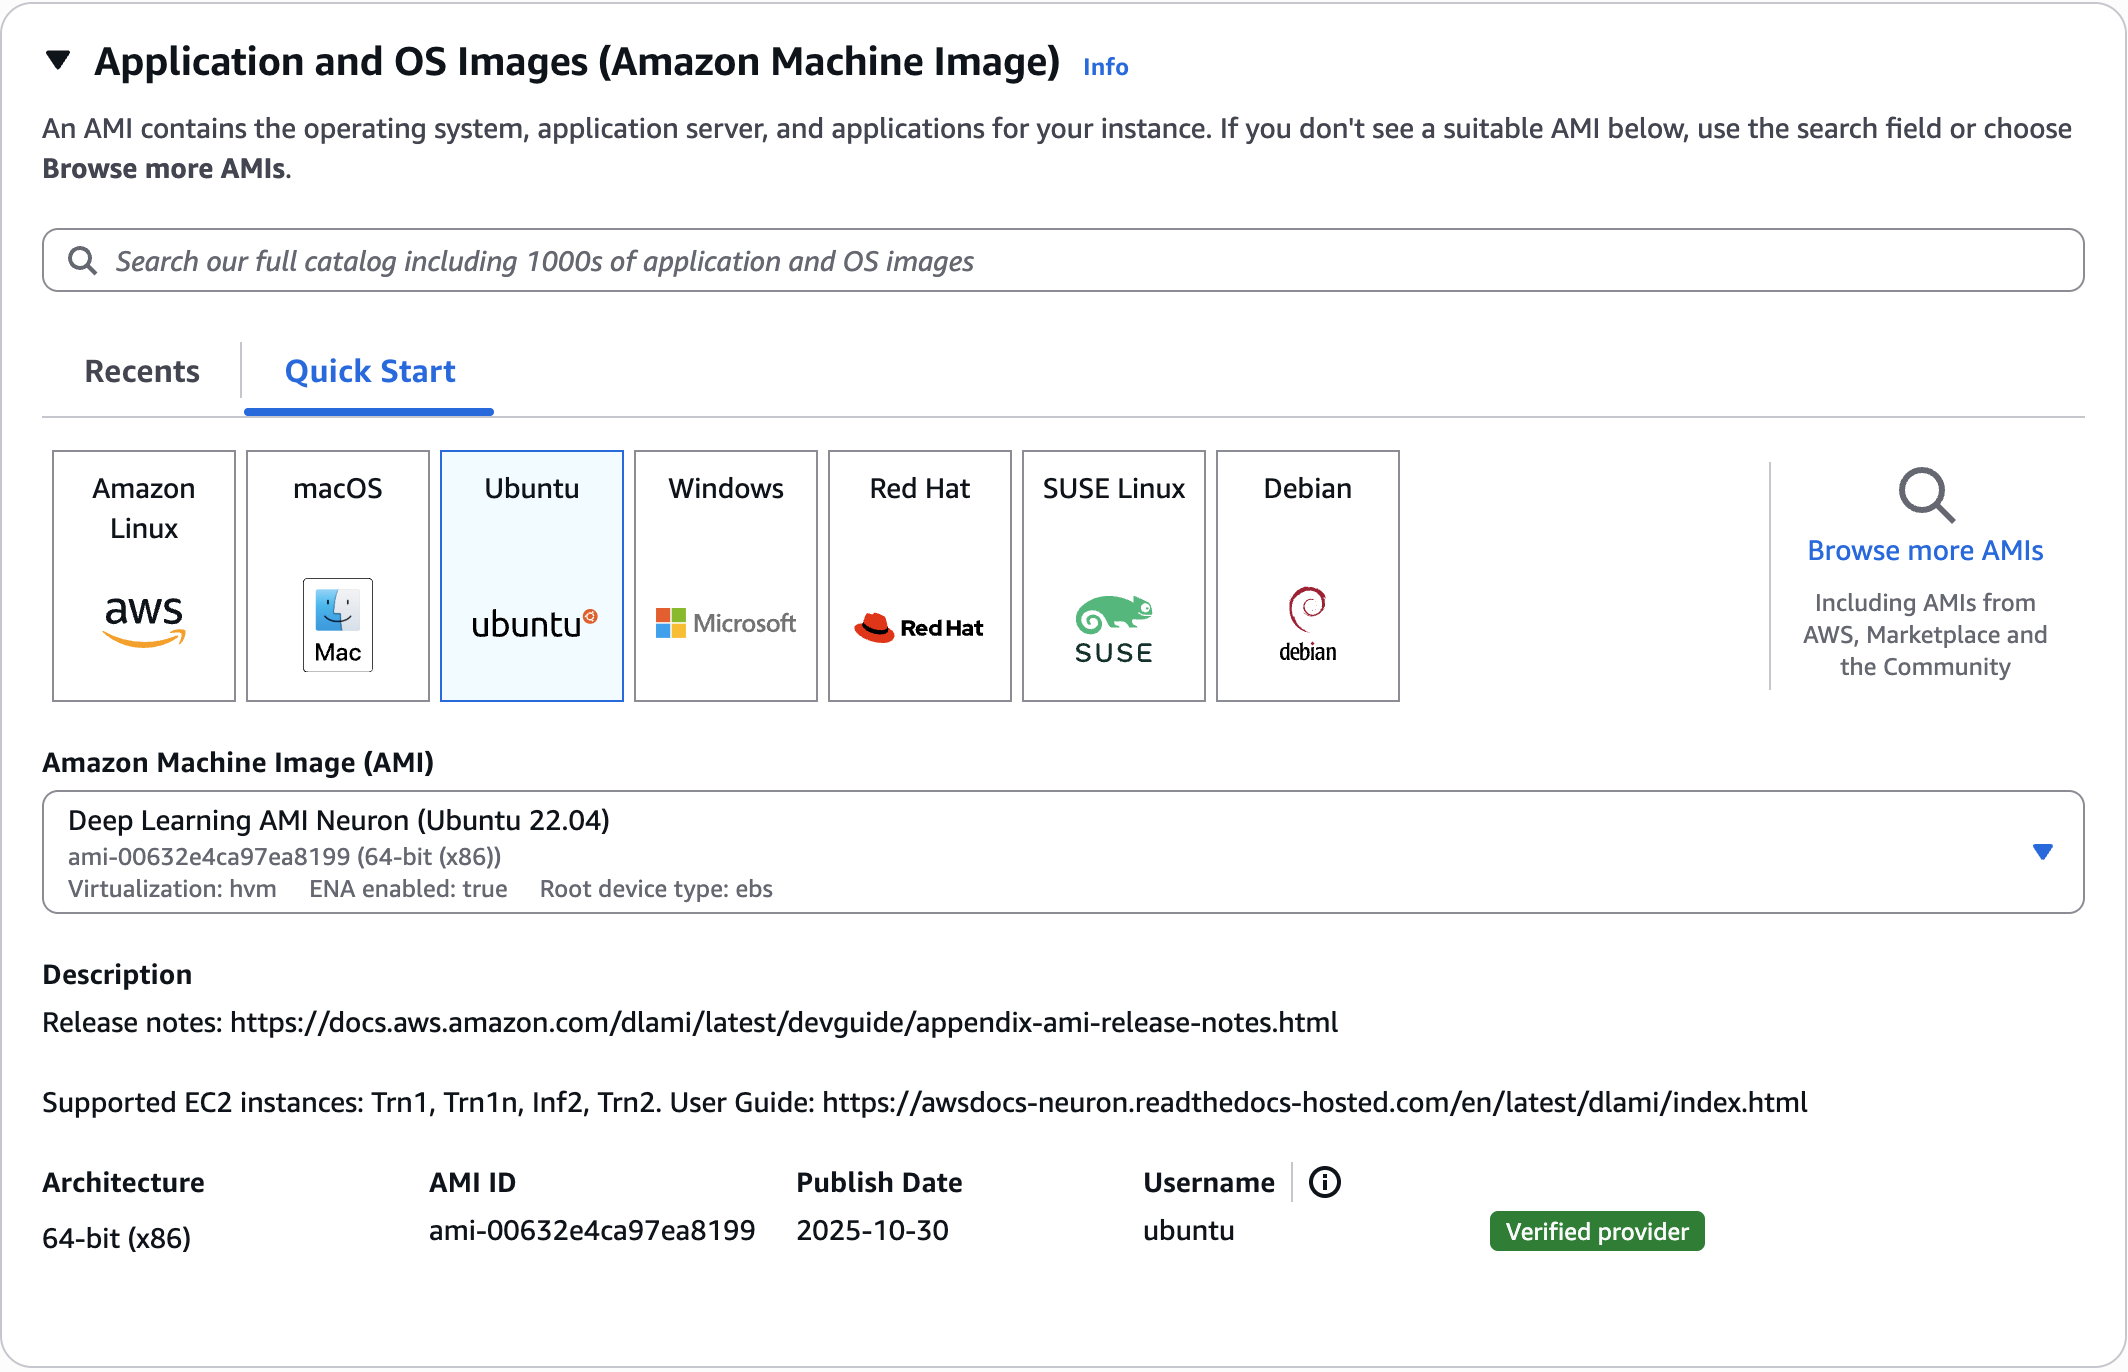
Select the desired region from the EC2 Console and choose “Launch Instance”. In the “Quick Start” tab, select “Ubuntu”, then in the AMI dropdown search for “neuron”. The “Deep Learning AMI Neuron (Ubuntu 24.04)” should be the only option. Select an Trn2 / Trn3 instance type. For more details see the Trn2 or Trn3 EC2 pages.
Once the instance is launched, an environment can be activated with the NKI library and Neuron SDK already installed.
Note: If you are looking to use the Neuron DLAMI in your cloud automation flows, Neuron also supports SSM parameters to easily retrieve the latest DLAMI id.
Launch the instance using the Ubuntu 24
Select the desired region from the EC2 Console and choose “Launch Instance”. In the “Quick Start” tab, select “Ubuntu”, then in the Ubuntu Server 22 AMI. Select an Trn2 / Trn3 instance type. For more details see the Trn2 or Trn3 EC2 pages. Note: You will need to allocate at least 50 GB of storage.
Install Drivers and Tools
# Configure Linux for Neuron repository updates
. /etc/os-release
sudo tee /etc/apt/sources.list.d/neuron.list > /dev/null <<EOF
deb https://apt.repos.neuron.amazonaws.com ${VERSION_CODENAME} main
EOF
wget -qO - https://apt.repos.neuron.amazonaws.com/GPG-PUB-KEY-AMAZON-AWS-NEURON.PUB | sudo apt-key add -

# Update OS packages
sudo apt-get update -y

# Install OS headers
sudo apt-get install linux-headers-$(uname -r) -y

# Install git
sudo apt-get install git -y

# Install Neuron Driver
sudo apt-get install aws-neuronx-dkms=2.* -y

# Install Neuron Runtime
sudo apt-get install aws-neuronx-collectives=2.* -y
sudo apt-get install aws-neuronx-runtime-lib=2.* -y

# Install Neuron Tools
sudo apt-get install aws-neuronx-tools=2.* -y

# Add PATH
export PATH=/opt/aws/neuron/bin:$PATH
Set up either a PyTorch or JAX environment to use with NKI
# Install Python venv
sudo apt-get install -y python3.12-venv g++

# Create Python venv
python3.12 -m venv aws_neuron_venv_pytorch

# Activate Python venv
source aws_neuron_venv_pytorch/bin/activate
python -m pip install -U pip

# Install Jupyter notebook kernel
pip install ipykernel
python3.12 -m ipykernel install --user --name aws_neuron_venv_pytorch --display-name "Python (torch-neuronx)"
pip install jupyter notebook
pip install environment_kernels

# Set pip repository pointing to the Neuron repository
python -m pip config set global.extra-index-url https://pip.repos.neuron.amazonaws.com

# Install wget, awscli
python -m pip install wget
python -m pip install awscli

# Install Neuron Compiler and Framework
python -m pip install neuronx-cc==2.* torch-neuronx==2.9.* torchvision nki
# Install Python venv
sudo apt-get install -y python3.12-venv g++

# Create Python venv
python3.12 -m venv aws_neuron_venv_jax

# Activate Python venv
source aws_neuron_venv_jax/bin/activate
python -m pip install -U pip
Neuron provides two different ways to install the JAX package. The first is a common package with jax-neuronx packaged together and tested with all the necessary dependencies including jax, jaxlib, libneuronxla, neuronx-cc, and nki. This package can be installed as follows.
pip install jax-neuronx[stable] --extra-index-url=https://pip.repos.neuron.amazonaws.com
Alternatively, jax, jaxlib, libneuronxla, neuronx-cc, and nki can be installed separately, with jax-neuronx being an optional addition. This version can be installed as follows.
pip install jax==0.7.0 jaxlib==0.7.0
pip install jax-neuronx libneuronxla neuronx-cc==2.* nki --extra-index-url=https://pip.repos.neuron.amazonaws.com
Upgrading an existing Ubuntu 24 install of the Neuron SDK with NKI can be done for PyTorch or JAX.
# Install Python venv
sudo apt-get install -y python3.12-venv g++

# Create Python venv
python3.12 -m venv aws_neuron_venv_pytorch

# Activate Python venv
source aws_neuron_venv_pytorch/bin/activate
pip install -U pip

# Install Jupyter notebook kernel
pip install ipykernel
python3.12 -m ipykernel install --user --name aws_neuron_venv_pytorch --display-name "Python (torch-neuronx)"
pip install jupyter notebook
pip install environment_kernels

# Set pip repository pointing to the Neuron repository
pip config set global.extra-index-url https://pip.repos.neuron.amazonaws.com

# Install wget, awscli
pip install wget
pip install awscli

# Install Neuron Compiler and Framework
pip install neuronx-cc==2.* torch-neuronx==2.9.* torchvision nki
# Update Python venv
sudo apt-get install -y python3.12-venv g++

# Activate Python venv
source aws_neuron_venv_jax/bin/activate
pip install -U pip
Neuron provides two different ways to install the JAX package. The first is a common package with jax-neuronx packaged together and tested with all the necessary dependencies including jax, jaxlib, libneuronxla, neuronx-cc, and nki. This package can be installed as follows.
pip install --upgrade jax-neuronx[stable] --extra-index-url=https://pip.repos.neuron.amazonaws.com
Alternatively, jax, jaxlib, libneuronxla, neuronx-cc, and nki can be installed separately, with jax-neuronx being an optional addition. This version can be installed as follows.
pip install jax==0.7.0 jaxlib==0.7.0
pip install --upgrade jax-neuronx libneuronxla neuronx-cc==2.* nki --extra-index-url=https://pip.repos.neuron.amazonaws.com
Confirm your work#
To test the NKI environment is set up and ready to use, a venv that contains the nki library must be activated. Select the tab below that corresponds to how you installed the Neuron SDK above.
The Deep Learning AMI provides a number of environments for PyTorch, JAX, and other supported ML frameworks. Any of the PyTorch or JAX venvs supplied as a part of the Deep Learning AMI will include the nki library. See the Neuron DLAMI overview for the full list of environments. For simplicity, the JAX and PyTorch tabs below each choose the plain JAX and PyTorch venv respectively.
source /opt/aws_neuronx_venv_pytorch_2_9/bin/activate
source /opt/aws_neuronx_venv_jax_0_7/bin/activate
The venv created in the setup step above can be activate as follows.
source aws_neuronx_venv_pytorch/bin/activate
source aws_neuronx_venv_jax/bin/activate
Once the venv is activated, confirm that NKI is available.
python -c 'import nki'
If the environment is setup correctly, Python should return without reporting any errors.
Common issues#
Uh oh! Did you encounter an error or other issue while working through this task? Here are some commonly encountered issues and how to address them.
Python reports an error trying to import NKI when using a Deep Learning AMI:
Make sure a PyTorch or JAX
venv(provided as part of the Deep Learning AMI) is activated. Your shell prompt should reflect this by starting with(aws_neuronx_venv_<framework+version>) ...
Python reports an error trying to import NKI in the
venvcreated as part of the Standard AMI install:Make sure the
venvyou created is activated. Your shell prompt should reflect this by starting with(<venv-name>) ...Make sure that the NKI library installation (with
pip) from the previous instructions succeeded.